
Food photography is an integral part of the restaurant business, now more than ever. We spoke to Columbus, OH-based commercial stills and motion photographer, Tommy Feisel, about how anyone can achieve mouthwatering imagery the DIY way. We’ll share easy tips and tricks to instantly improve your food photography skills and attract new customers.
The Discovery Process
Having trouble implementing your photography plan? Here are two questions to ask yourself before you start shooting:
- What are your goals? Goals range from social media snapshots to an entire rebrand.
- What are you trying to communicate with your food and brand?
The photos of your food should tell a visual story to your guests and prospective customers. This story should also capture the feel and basic aesthetic of your restaurant so that potential visitors know what to expect and feel confident in their decision to try something new.
Next, let’s move on to the most important facet of commercial food photography — lighting, including color temperature, outdoor lighting, and lighting for beverages.
Lighting for Food Photography
The most important aspect of food photography lighting is matching color temperature – a skill that bleeds into all other aspects of food photography. We will also give you tried and true tips on how to get a proper outdoor patio shot and some simple ways to light beverages.
What Is Color Temperature?
Color temperature is the color of light emitted by a light source. The colors range from red to blue or, in other words, warm to cool. All of the light sources used to photograph a dish or beverage should match each other in warmth or coolness. Here is a simple equation to keep in mind:
Warm Light + Day Light = Inaccurate Colors
If a warm incandescent source is your strongest light while shooting, but you also have cool colors from an open window, your photo will look inaccurate and potentially strange. As in ‘why is this hamburger green?’ strange. When tempting customers with a mouthwatering photo, you’ll want to be as accurate in color as possible.
The Fastest Way to Achieve Accurate Color Temperature
Another great pro tip: If time is of the essence, you can still capture a great photo and fast. Simply, gravitate towards the windows and other natural light sources, while turning off all the bulbs and overheads in the vicinity. Using a single, natural light source is the easiest and fastest way to achieve accurate color representation of your food and produce a vivid and natural photograph.
Outdoor Patio Food Photography
Speaking of natural lighting sources, the full light of day often results in too much contrast within a photo. If your establishment has a patio, here is an easy way to reduce color contrast.
The trick is to use what you have available at your disposal. For instance, diffuse day light with a patio umbrella. This will reduce the contrast that full day light brings and produce a more accurate representation of your cuisine. You can then play around with additional directional lighting to create the atmosphere that best reflects your establishment.
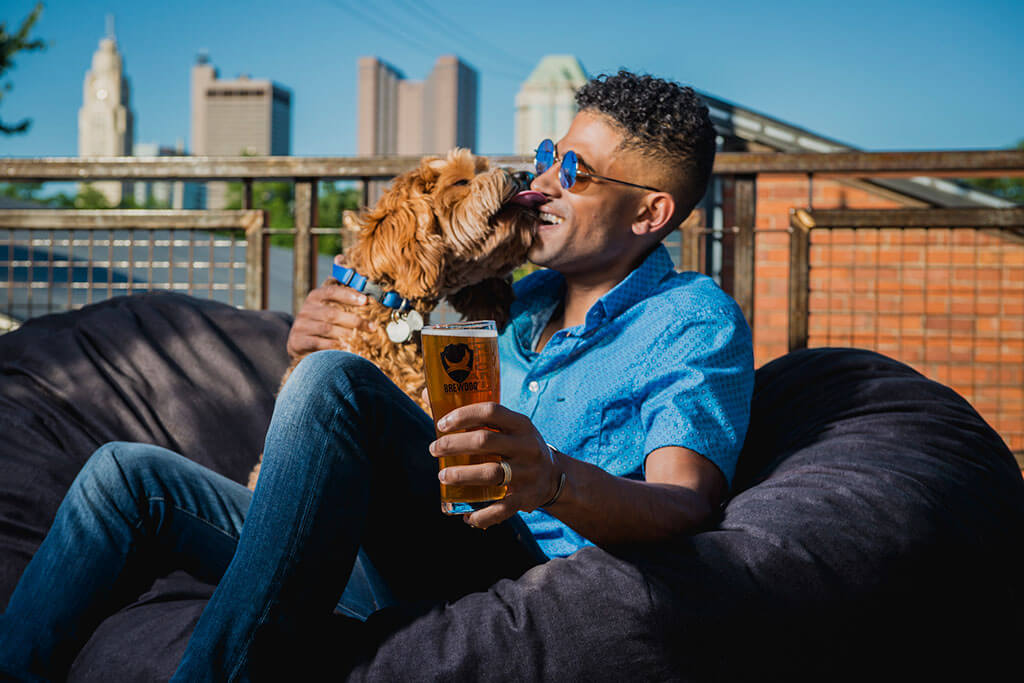
Beverage Lighting
With beverage photography, the trick is to shine light through the glass in a way that best illuminates the drink’s color and texture.
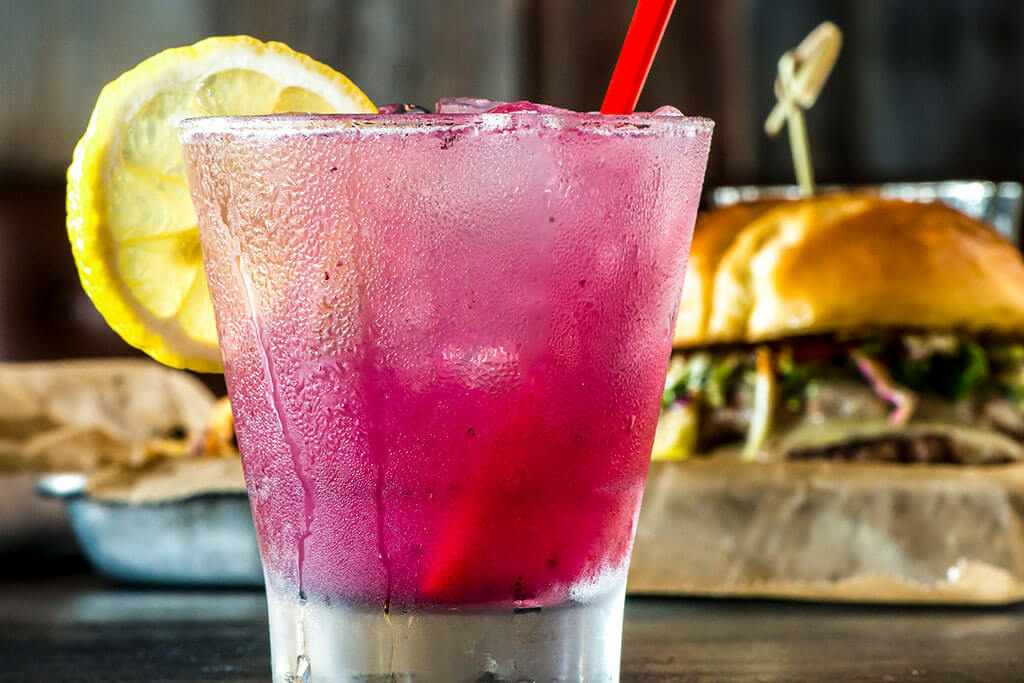
For this shot, Tommy used a main light on the left side and another light slightly to the back on the right side to illuminate this beverage.
In general, position the main light source to the side, or a little behind the glass. Next, position a secondary light source on the opposite side. This will allow the main light to bounce back. This technique will illuminate your drink beautifully and create enticing color gradients within the beverage.
The most important takeaway? Don’t position a light directly in front of the glass. The light should be shone through the glass from a side angle, a back angle, or a combination of the two.
Framing & Composition for Food Photography
Now that we’ve learned some basic lighting techniques to produce the most accurate colors of your food, we can move on to framing and composition.
Individual Elements Take Center Stage
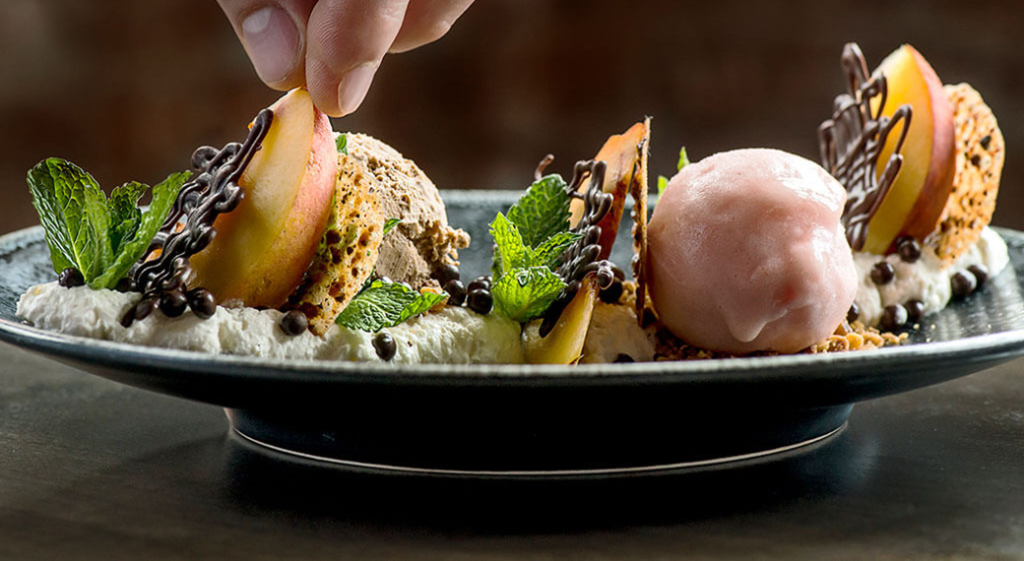
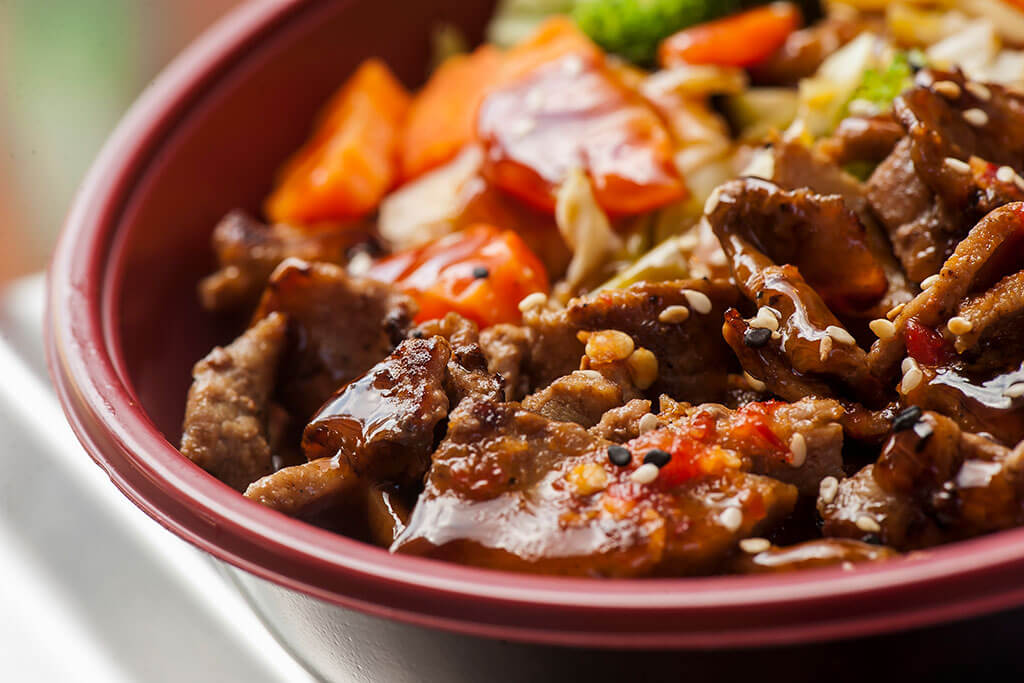
The most important aspect of framing and composition is to focus on individual elements. When chefs prepare and plate a dish, everything is intentional: the ingredients, the placement, and level of complexity. They think about how their customers will look at the dish, smell it, and experience it with their eyes.
Now, think about how the customer views the dish. What are they looking for and what will they focus on? As Tommy noted, “When taking a photo, paying attention to the small details, like customers do, is a worthwhile challenge.”
The closeup shot above highlights the fine texture of the seeds, glaze, and perfectly braised beef. Getting in close exemplifies the diversity of texture that your customers crave and showcases the elements that will stand out to them, for instance, the sesame seeds.
One rookie mistake is to focus a little behind when they should be focus it forward. It allows the eye to lead into something when using a shallow depth of field. As he explained, “You’re really trying to illustrate the quality of the dish itself as individual ingredients and then as a whole.”
Another great tip to highlight individual elements on a plate is to examine a dish from all angles and rotations as though you are the customers. Think about what makes you want to eat it and which elements stand out. Sometimes the answer isn’t the most obvious ingredient on the plate.
Creating an Organic Feel
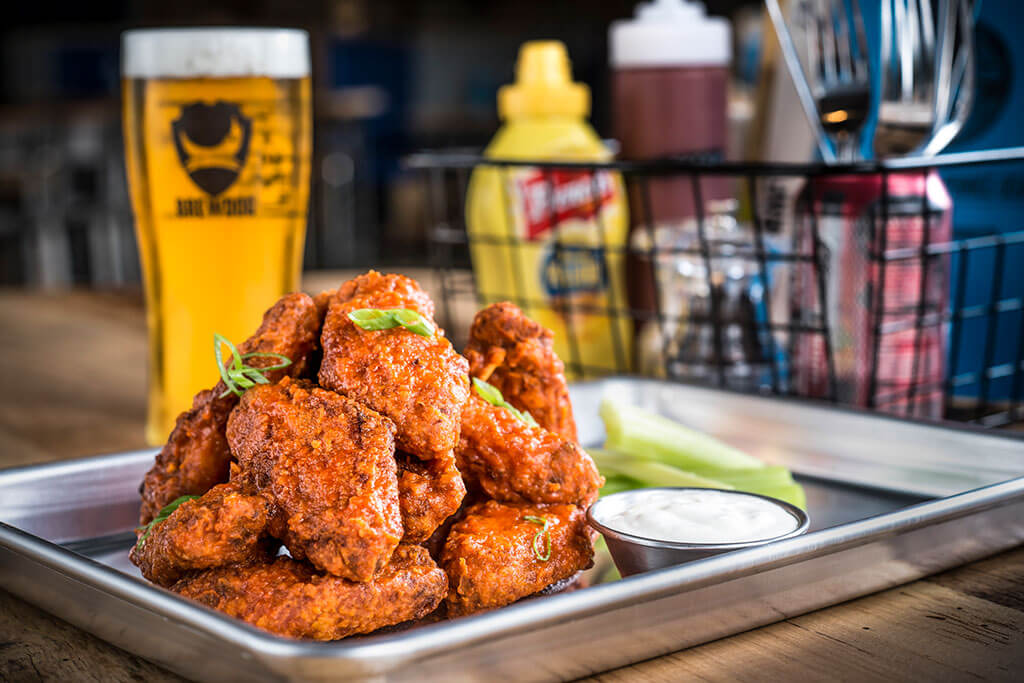
When framing a shot, focus on individual elements while providing an overall feel of your restaurant.
By adding other dishes and drinks around the focal point, the photo will feel more organic as though the picture was taken during dining hours. This will allow customers to get a sense of what a table looks like and the restaurant’s vibe in general, which is very useful in their decision-making process.
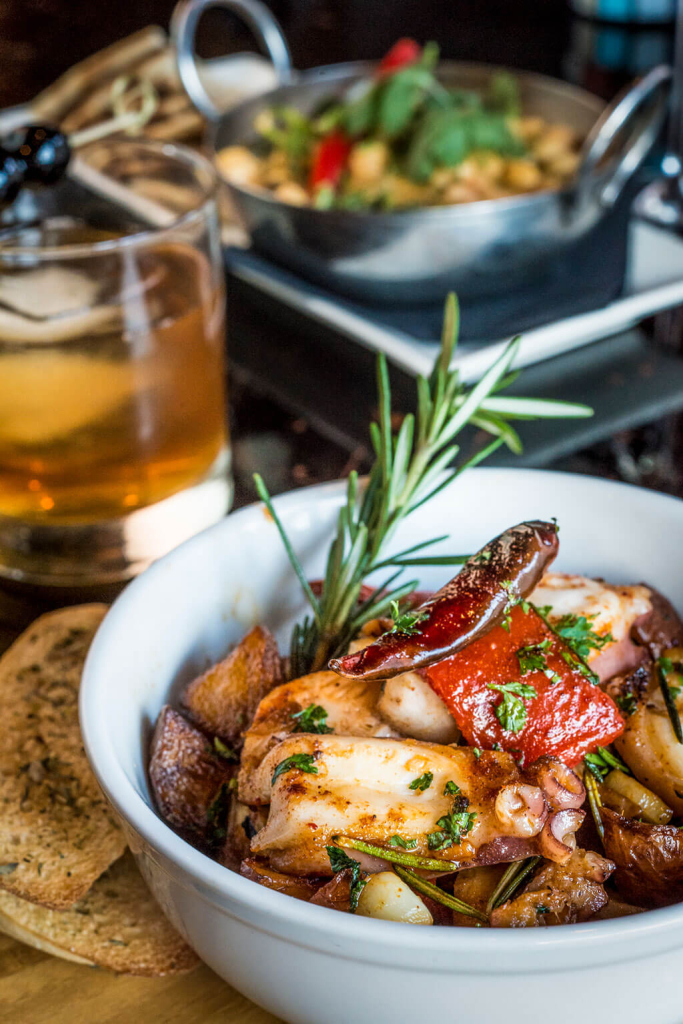
To reiterate, when framing a shot, focus on individual elements. But also provide the overall feel of the restaurant. Here are some excellent insider tips to keep in mind on how and why to capture an organic feel.
- Provide depth to the image with a foreground, middle, and background.
- Add other elements to the shot to represent a typical place setting during dinner service, like drinks, other dishes, saltshakers, or chop sticks.
- Try shooting from a lower angle to add depth.
- Focus on the dish in front. Make sure you are shooting to provide a sense of either what a table looks like or what restaurant looks like as a whole.
Without the additional elements, the photo above would feel empty. As Tommy noted, “When you are sitting at a table with six people, there’s food and drink all over the place. Those extra elements help build the depth while drawing your eye into the focal point.”
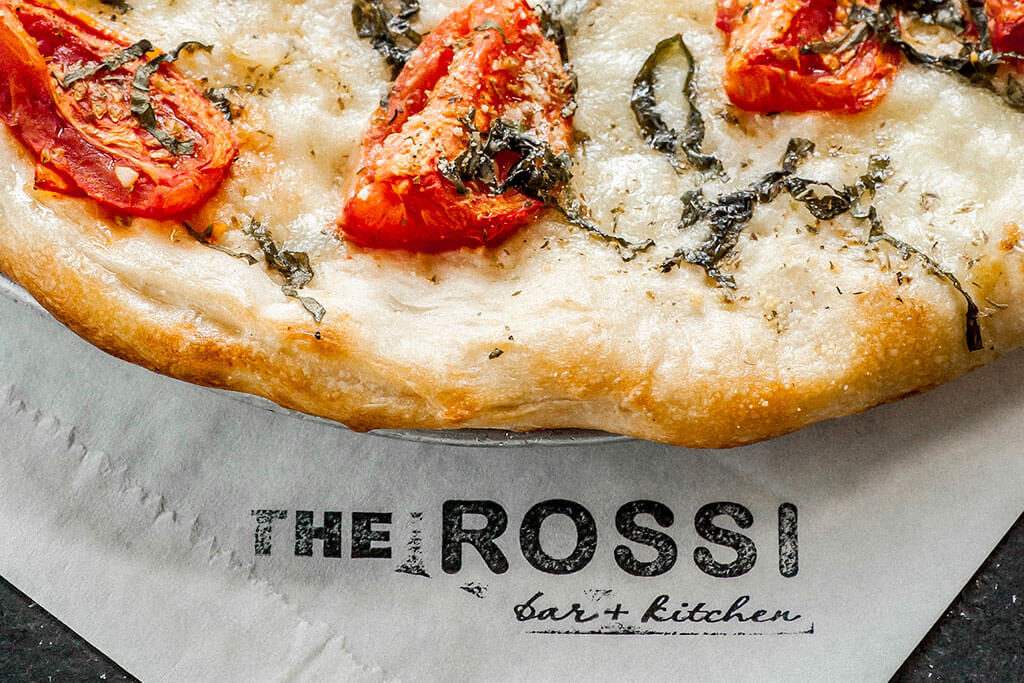
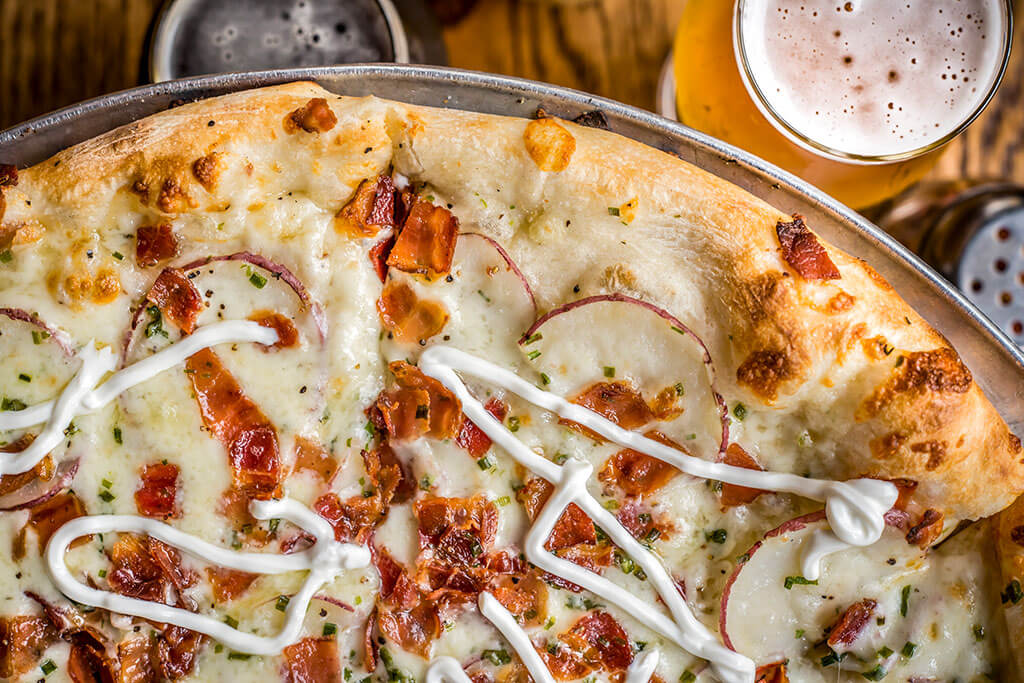
How to Handle Overhead Shots
Creating an organic feeling in a photo is especially important for overhead shots. This angle only works well when there are other elements incorporated into the photo, including table setting elements, branding, and depth.
The photo below works because of the logo is in the bottom of the frame. It’s an excellent example of a branded image that shows off the dish.
Make sure to add elements into overhead shots to make it feel like an organic table. For instance, the shot below includes the beer and red pepper shakers which are found on nearly every table at this particular restaurant. Tommy also added depth by shooting the overhead with the pizza on a platform, just as they are served in the restaurant. It also introduces beers. Having beers on draft is part of their business model, so it makes sense to incorporate it into their marketing.
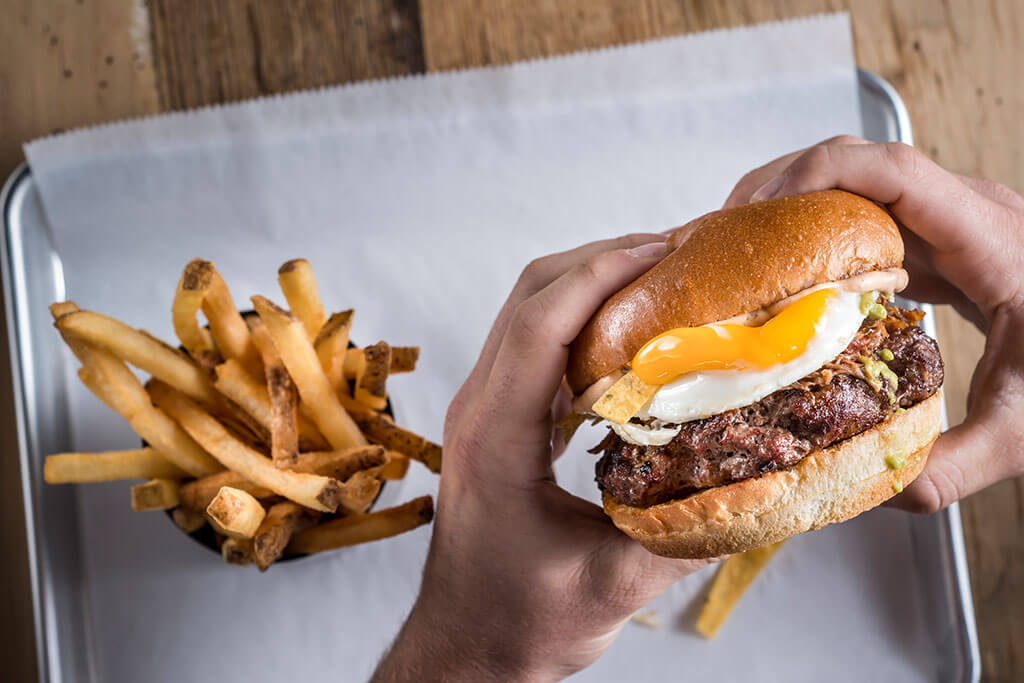
Another example of varying depth is this overhead shot of burgers and fries. This one required the photography to shoot on a step stool looking over someone’s shoulder — a great example of thinking outside of the box.
Getting Eyes on Your Food Photography
Now that you’ve got a great shot of your food, it’s time to share it. Next, we’ll talk about the social media tips we learned, to get you on the right path.
Social Media Tips
Building a solid web presence includes posting regularly on Instagram, Twitter, and Facebook, for starters. Because so many restaurants have closed temporarily or permanently due to the pandemic, customers look to see who is definitely in business and who is on hiatus when deciding how to spend their money. Maintaining up-to-date social media pages is the fastest way to convey that you are open and ready to serve.
Currently, Instagram is the hottest spot for restaurants to gain free advertising in an aesthetically pleasing manner. To have a quality page and create an instant great first impression make sure to have 10 images that can tell your food story.
While you should be building a library, 10 consistent, high-quality images that showcase your food is a great place to start. No matter how big your library is, photos should remain consistent in terms of look, so these first 10 images will set the tone for your Instagram page overall.
One Image Communicates a Thousand Words
Having amazing food photography on your website and social media pages is the best way to attract new customers and keep current customers interested, engaged, and hungry. We hoped you learned a lot from Tommy Feisel’s food photography tips and tricks. To contact him Tommy and view more of his work, please click here. If you have any advice you’d like to share, be sure let us know in the comment section!
Contact a Food Photography Pro
Looking for more help? Tommy Feisel is a commercial stills and motion photographer based in Columbus, Ohio specializing in people, food and corporate imagery both in studio and on location for a wide variety of brands and businesses.
